Podcats pillow
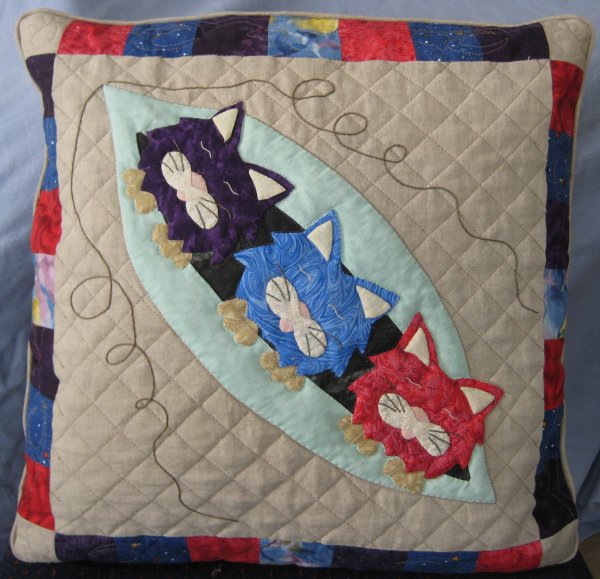
What caught my eye, besides the entire collection of pattern dealing with cats of depicted as various vegetables, is that this specific one was 3 little kittens. In a pod. Kinda reminded me of my 3 girls, now not so little. :-)
A small digression: when my girls were small, I 'color coded' them so that they (and myself) would be able to know which item belonged to which girl. Before they learned to read, they knew colors and knew instantly what stuff whas theirs. Our oldest got blue; middle daughter got purple; youngest daughter got red. When I needed to buy them all an item, I tried very hard to find the appropriate colors. It was fantastic when I found toothbrushes in the "right" colors!Further aside: it has become ingrained in me. To this day, when I find ANYTHING in those 3 colors, I really need to restrain myself from buying them. My girls are now adults and can buy their own color coded items. One time I was at a pet store and found cat cages in pink, blue and lavendar. Boy, it was a struggle not to buy them! Ditto with the whistles or candles or soaps, etc, etc, etc. It just doesn't matter if they need (or want!) the item or not ... it's in the appropriate colors!!
So when I saw Podcats, I instantly saw it as a throw pillow made in the 3 colors. The entire quilt is simply delightful, but honest to goodness, I DO NOT NEED another project! So, I exercised extreme restraint and bought ONLY this one block pattern. I was so proud of me. :-)
In early February, I attended my annual Quilting Retreat. I had a Forever Project™ to work on there, but "just in case" I happened to finish it, I prepped and brought along Podcats. As it turned out, I *did* finish the handwork on the Forever Project™ but not until the last day of the Retreat. I never even pulled Podcats out.
But when I returned home, I needed another Forever Project™ and this was it. I figured that this one might last me a little while. Boy, was I wrong! Even with needleturn applique, it took me exactly 3 days to do all the applique. True confession time: because I am devoting my quilting time to getting my List of 17 Tops quilted on Lizzie, I am not piecing new tops. This means I need something to do in the evenings, when I'm spending time with Mr. Pirate in front of the TV. The handwork for Podcats was ideal ... and I very quickly finished it.
The face elements were done for each cat.
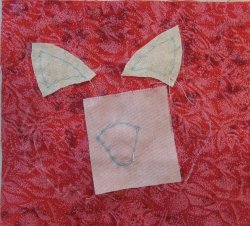 | The applique fabrics for the ears and nose/mouth are basted into place. |
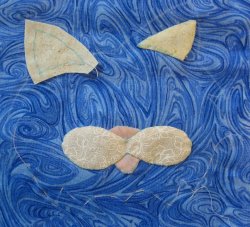 | I've now done the "cheeks" so that the nose & mouth appear to be separate pieces. I still need to finish one ear. |
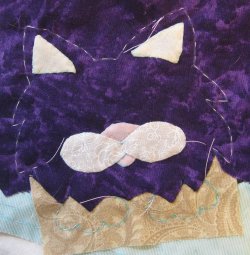 | I've finished all the appliqued facial features, as well as the chin fur that overlaps the paws. |
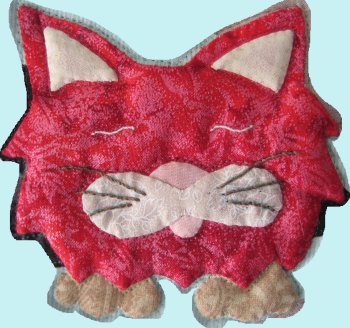 | And this is the finished cat's face. |
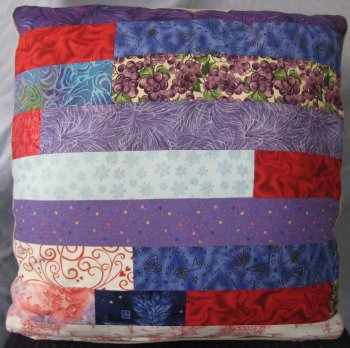 The back of the throw pillow was strips of fabric in shades of red, purple and blue. As is my habit, I put in a concealed zipper at the bottom of the pillow cover so it can be removed for laundering.
I used a faux trapunto technique to make the cat heads very puffy. This was further enhanced by stitching around Every. Single. Applique. element.
Once that was done, I made my mini-quilt sandwich and quilted the block on my home sewing machine.
The background was quilted with diagonal cross-hatching.
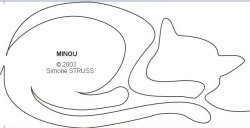 I found a delightful resting cat pantograph ("Minou" by Simone Strussel) and sized it to fit on my patchwork border. (note: "minou" is informal French for a kitty or pussycat)
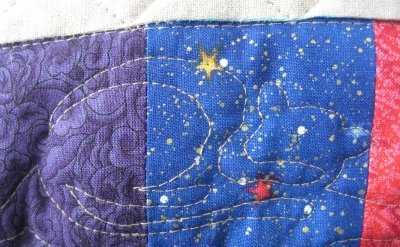 I knew that I would never, ever be able to free-motion the resting cat design and have it LOOK like a resting cat. So, I used a technique that I've used before ... on very thin, crisp, translucent paper, I traced the resting cat design. Using temporary spray adhesive, I stuck the paper onto the border area. Then I simply followed the traced design. The needle perforates the paper making it easy to remove afterwords. I always use the blunt edge of my seam ripper to "score" the stitched line and pointy tweezer to remove the paper.
Let me say that removing paper that has been stitched through is NOT a favorite activity of mine but I was willing to do it for just this one block (which I why I never, ever, ever do standard paper-piecing. I'm just NOT going to tear the paper away from all the quilt blocks. I use the freezer paper-piecing method instead. Much better.)

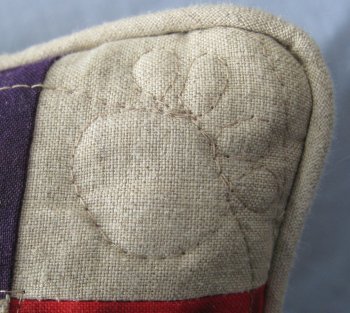 A cat's paw was stitched in each cornerstone.
The cat's paw in the cornerstone was drawn onto the fabric with Collins' "The Fine Line" water erasable marking pen. This particular brand seems to actually dissolve without the blue stuff spreading out to the edges of the water and reappearing when the fabric dries .. which is exactly what was happening to me with the Clover brand. I make sure I buy the Collin's brand these days.
Then I just stitched over the drawn lines. Very easy.
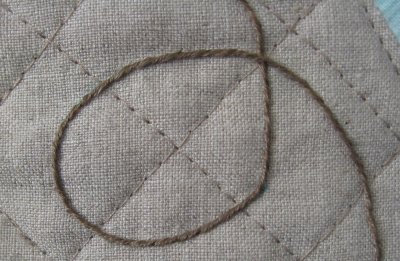 After everything was quilted, then I did the hand embroidery. I have never, ever, ever been able to successfully master the stem stitch/outline stitch. My stitching just doesn't look good. HOWEVER, once I discovered the whipped backstitch, I was one happy camper! The end result is that the whipped backstitch looks EXACTLY like a stem stitch/outline stitch. True, I do need to make two passes over the line instead of one, but the final stitching turns out just wonderful for me. So, the whipped backstitch is what I used to make the pea pod tendrils, the cats' whiskers and closed eyes.
By the end of the third week in February, this throw pillow was DONE. As in FINISHED. As in "residing on my couch"! Wowsers!! A fast finish indeed!
But now, I need a new Forever Project™ :-)