Chicken Placemats
for a circular table
and matching coasters!
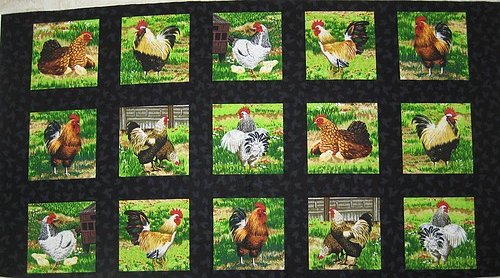 On our trip through Arizona in September 2011, one quilt shop that we stopped at had the most adorable chicken blocks. There were 16 blocks to a repeat, 4 blocks across x 4 blocks down. Our neighbor who looks after our animals for us when we are on trips just *loves* our chickens. She has been known to drop by, for no other reason than to give her kitchen scraps to our ladies. Apparently, there is no accounting for the bizarre behaviour of people. :-)
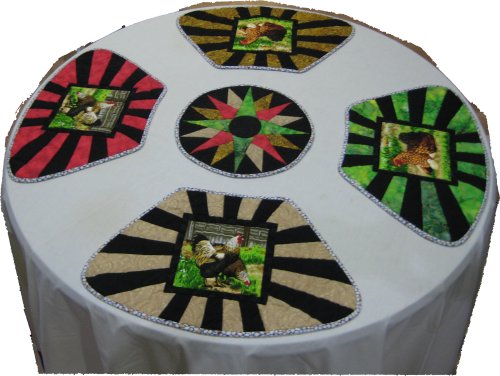
So, when I found these chicken blocks, I immediately thought of how to use them in a project for her. I knew that she had a round dining room table. I know that standard placemats don't always fit nicely on round tables BUT I had a pattern for a wedge placemat that DOES fit nicely on a round table!
I bought 1 repeat of the chicken blocks because I wasn't quite sure, other than 4 placemats for her, what else I would do but didn't want to limit my options. :-)
Originally, I was going to make a checkerboard background for the chicken blocks .. checkerboard being nicely "country". But the blocks themselves were an obnoxious measurement and they weren't exactly square .. so a patch that worked in one direction wouldn't work in the other. I didn't want to spend *a lot* of time fussing with this because I wanted to give her the placemats whilst we were both still alive. :-)
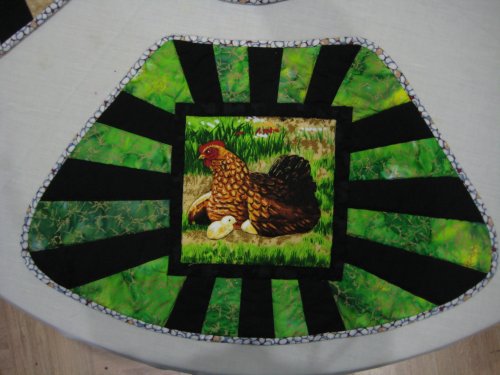
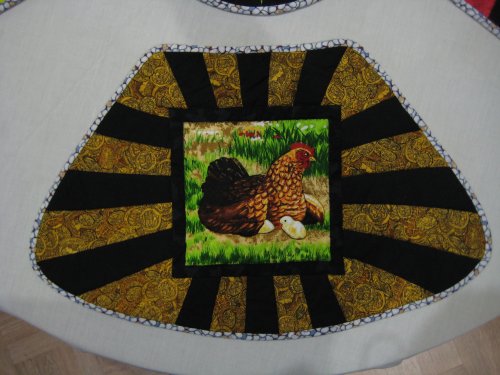
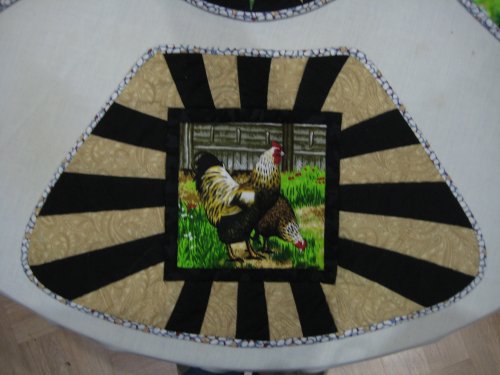
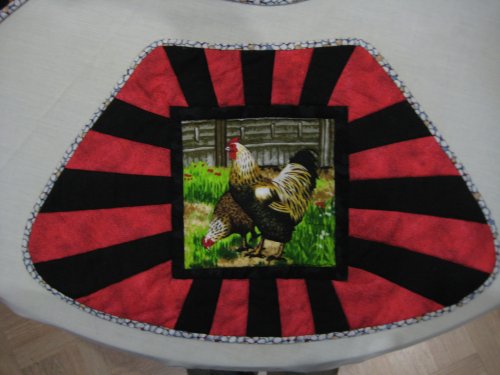 I came up with a "radiating ray" background that turned out quite dramatic. Her color scheme is gold, green & red .. and all those colors were in the chicken blocks. I used those colors as the rays in the placemats ... alternating with black.
I decided to keep the quilting very simple for the placemats: stitch in the ditch for all the seamlines and outline stitch the chickens in the print block.
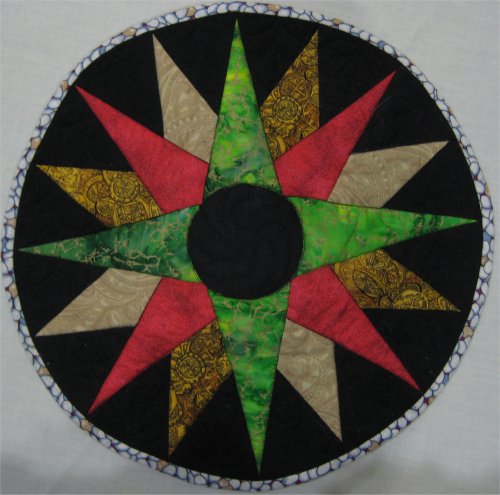 I also made a round center placemat (so there wouldn't be a "hole" in the middle of her table!) using a Mariner's Compass star.
The Mariner's Compass also got stitch in the ditch around the star points and some free motion quilting feather things in the black outer triangles and a circular feathered wreath in the very middle.
Dang! Why didn't I take a close-up picture of those feathers???? Whatta doofus.
Oh wait ... I know why. In looking at the close-up pictures I did take, the black fabric soaks up all the light and you can't see a doggone thing! Black stitching on black fabric is just impossible to photograph easily. But, take my word for it, there *are* feathers quilted on the Mariner's Compass mat!
 The fabric for the binding was something that I had on hand ... eggs! A very small scale print of different colored eggs turned out to be THE perfect finishing touch! :-)
 Upon returning home, we had a week's break before we were on the road again, this time to Oregon. I made the placemats during that week. I brought the placemats with me so I could hand stitch the binding whilst we were traveling.
 I gave her the placemats the other night and she was very, very touched that I made them for her. She said it was a perfect incentive for her to clean off her dining room table! :-)
Let's fast forward to December 2011. I have a sneaking suspicion that this neighbor is going to be bringing over some homemade goodies as a Christmas present. This always puts me in a bind: I don't care for cooking, baking; I don't want to go out and buy "something" ... but I do feel that I need to reciprocate. What then?
 OH, I KNOW!! Coordinating coasters! How fortunate that I didn't think of them when I made the placemats! :-)
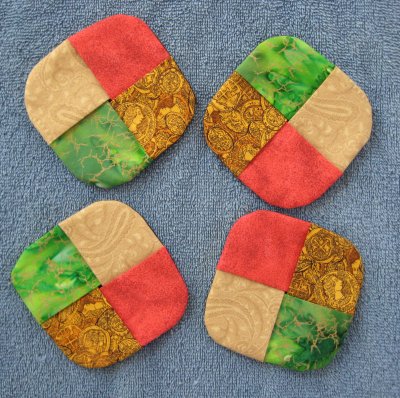
The Criss-cross Coasters from Jenny of Allsorts were the *perfect* solution: I could use all the colors from the placemats so it would look like a set. I was also fortunate that I had enough of the fabrics still available in my stash! (These coasters are 4" square when finished, making them a great item to use with charm squares.)
The directions call for making these coasters as a square. I know from experience that turning crisp corners can be a problem; I avoided the corner dilemma all together by simply rounding the corners, using a spool of thread as a template. My coasters ended up as a "rounded square". Much easier.
Alternatively, you could also make the coasters as a circle, using an appropriate circular template.
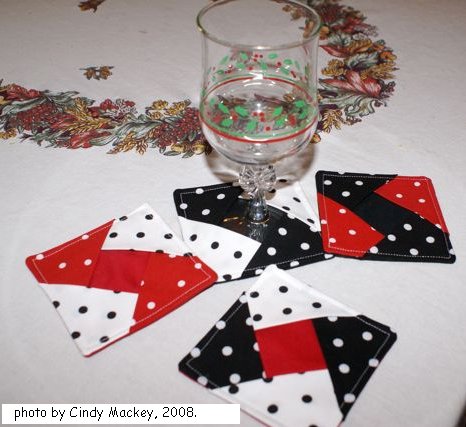 One clever person realized that since the top is made of strips "woven" together, those strips are loose. You can actually slip the foot of a wineglass INSIDE those strips. Although you technically don't need a coaster with a footed wineglass (as the foot doesn't sweat or form condensation), IF YOU WERE CLEVER ENOUGH, you could make one of the strips unique ... by color or by embroidering a design on it ... and then the coasters also become *identifiers* .. you'll never get your wine glass confused with someone else's again!
But I wasn't clever enough to have thought of that before hand, so my coasters are all the same. :-)
The picture to the right is of coasters made by Cindy Mackey in 2008. She describes how she altered the original directions slightly to get her version on the SewForum message board.
I have discovered that you really don't need to change the original directions at all ... you can still easily slip the foot of a wine glass inside the woven strips, but her picture is a wonderful visual inspiration.
So now I have the coasters as a gift. Do I have a small enough box to put them in for wrapping? Of course not. Am I going to brave the shaggy hordes to buy a small box? Of course not. Are you deranged?? It's December 22nd!! It's a ZOO out there! Me? I'm staying home!
*I* am a crafter! *I* will MAKE an enclosure for the coasters!
The internet is a fabulous place, ya know? Creative people love to show their work and many of them offer tutorials on how to re-create them yourself. Lisa (the Mom) and Sarah (the daughter), of Spoonfull of Sugar blog, posted such a tutorial this past February. A small fabric gift pouch that is quick and easy to make but also looks so doggone cute!
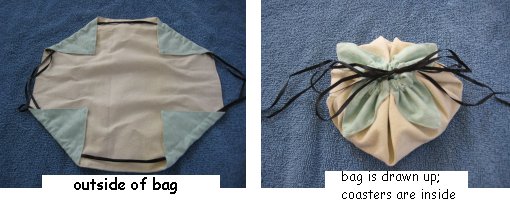
In the picture above, you'll see the flattened version on the left. When you draw up the pull strings, you get this ADORABLE little pouch! The directions in the blog make a very small pouch; I cut my fabric squares at 11-1/2" in order to adequately hold the coasters (which are 4" square when finished).
Should my neighbor not want to store the coasters in the fabric bag, she can use the pouch as storage for something else. See? It's versatile! :-)