Falling Maple Leaves
Date made: July through October 2002
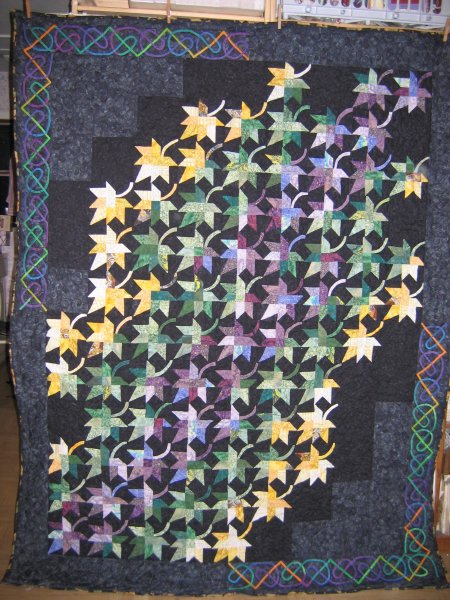
 Back in July 2002, I took a class at my local quilt shop. The teacher's sample was a lovely 48"x48" graduated color Maple Leaf.
I didn't want a square quilt nor did a 4' square quilt seem too useful to me, so I enlarged it to a twin sized quilt by adding more rows, columns and a border of Celtic knotwork.

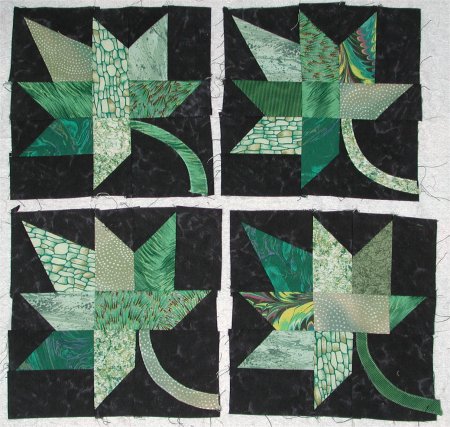 This was a quilt that you REALLY needed to concentrate on, so that you got the correct color combination in the right place on the quilt! Although the basic block was a Maple Leaf, there were several configurations. I made a color mock-up first and *constantly* referred to it when making each block. Each block is unique ... in the fabrics that were used, in the placement of the fabrics and in the segments used to make up the Maple Leaf. Here you can see four variations of the leaf block.
I had previously bought RJR's "Aurora" line of fabric, which feature a full blending of several colors from selvage to selvage. It was this fabric that I used for the Celtic knotwork. You'll see that I put the Celtic knotwork in two opposing corners; the quilting motif I used in the remaining corners repeats the Celtic knotwork design.
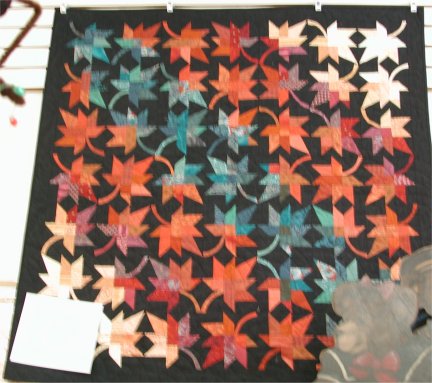
As I was working on the top, I discovered waaaay too late that the fabric I was using for the Maple Leaf background was insufficient to complete the top. Ooooops. Since the background fabric had come from my stash, I had no way of knowing either when I bought it or where, so getting more wasn't an option. What I decided to do was to use an entirely different, but compatible fabric to fill out the rest of the blocks needed for the top. If any one asks, I'll just say it was a design decision. [grin] [rather than faulty planning on my part!]
For the quilting, I had bought a new (at the time) book called "Quilting Back to Front". I'm always on the lookout for ways to making the quilting part easier for me. [The easiest way would be to get a long arm quilting machine, but I don't think that's gonna happen any time soon.] The premise of the book is to get a fabric for the backing that has sufficiently large enough design elements that you then outline stitch FROM THE BACK. There is no marking involved as the path you take for the quilting simply follows the outline of the designs in the fabric. Wow .. how much more simple could it be? [Answer: see above comment about the long arm quilting machine. :-) ]
So, I bought a fabric that had some "large-ish" leaf motifs. I stablized the sandwich with spray baste; stitch-in-the-ditch around the border and around the Celtic knotwork. That being done, I proceeded to use the leaves as a guide and began my quilting from the back ... center outwards. It actually turned out fairly well. The design looks more like a stylized meander from the front .. that that's OK. It nicely flattens out the top. The batting I used was really, really weird. It was something I had in my stash .. a very loose and airy sort of batting .. almost like fiberfill, but it was definitely batting. It didn't have any bonding or scrim on it, which is why it was very loose. Because of that, the spray baste didn't work too well on this batting. It also didn't help that the quilt had been worked on, put away, hauled out, worked on, put away, etc, etc, over the years until *just now* when I finally could get back to it .. bite the bullet and FINISH IT. As a result, there are puckers and tucks in various places, especially where the quilting of the central part of the quilt butts up against the stitch-in-the-ditch stitching around the borders. Fortunately, the backing fabric is dark and those eyesore items don't glare at me too much.
However, I am very, very pleased that it is finally done (2-1/2 years after the class!).